Friday, January 30, 2015

Pollen Coming In

It's January 30 and the temperature is in the mid 50's. It's partly cloudy and we are expecting rain tomorrow. I got home around 4 and noticed that the bees are bringing in Pollen. Not a huge amount but many of the bees were returning with full baskets. I saw this activity from all five hives which makes me pretty happy.

The pollen must be heavy because several of the bees came in a little too low and had to come up to the entrance. One girl decided to take a little rest on my pants before she entered the colony.
                                                    I haven't gone in yet this year to check to see if the queen has started laying. I suspect she has, because we had temperatures in the 70's and 80's pretty much all this week. A cold front has come in and temps next week are going to be back to normal with highs in the 40's and 50's. If there is no wind and the sun is out, they will be able to get a lot done. I looked in the two, single deep hives and check on the sugar that I gave them about two weeks ago. They are really starting to eat that and I may
have to add some more at some point.  It won't be long before I can do a complete inspection and see what's going on in there.
Well, it's almost the end of January 2015 and I can't believe it's been so long since I last posted. I really have no excuse and looking back, I really wish I had posted more. But, no sense looking back. We must look forward to bigger and better things to come! I'm not even going to say that I will try to keep this up, because it may jinx me.

Okay, an extremely quick update. Since catching a swarm of honeybees a little over a year and a half ago, I now can say I have been pretty successful in the hobby beekeeping department. I have 5 hives now and really enjoy working with them. I built a stand during the early spring of last year and expanded enough to have to create a little temporary stand for the fifth hive.


None of my bees were purchased. They were all from traps, swarms or cutouts. If it is true that time is money, then these hives are worth quite a bit. Some of the colonies that I have acquired took quite a bit of time.

In the year and a half of raising bees, I have learned so much about this cool little creature but still have a lot to go and it seems I learn something new every day that I look at them.

At this time of year, the bees don't come out much because of the cold weather, but we do have warm days where they are able to do some house cleaning and stretch their wings a little. I am really looking forward to March where they will really be expanding and building.

I really haven't decided what I want to do ultimately. With three hives, I was able to get enough honey to supply us for a year and give some to family and friends. I do know that I want to get about twice as much this next year. I would like to be able to sell a few jars.

Saturday, July 13, 2013

Update!

To make a very long story extremely short, I have bees again! And boy, do I ever! This post is going to be long, really more for documenting this journey than for just enjoyable reading, but here goes!

Some time ago, a couple of years in fact, I tried to build a bee swarm trap. I was successful at building it, but unsuccessful at catching a swarm. When I lost the only colony that I owned, it kind of took the wind out of my sails, but I really did enjoy trying to raise bees and they were so fascinating to watch and learn about. In the back of my mind, I wanted to try again, but it seemed that timing was everything and ordering bees was kind of tricky and expensive and I was struggling with what to do. About 7 months ago, I called Dadant to put my name on the list for a nuc of honey bees. Dadant is the company that I purchased my first colony from two years ago and I thought that I would go ahead and do that again. That idea was quickly squashed when I was told that they don't offer nuc service anymore. My other options were to order a package of bees or try to find a friendly, local beekeeper that would sell me one of his young colonies. Both options are expensive and not really something I wanted to do.
 
I then decided to consider swarm trapping once
 again. The website from which I learned about swarm trapping in the first place is a wonderful site to learn about beekeeping and the guy's videos are very informative and I felt like connected to what he was saying. I learned that he had written a book about catching swarms and so I purchased it. The book really doesn't say much more than what was in his videos, but I enjoyed reading it and I learned a lot about swarms and bees in general.  I learned that swarm season in Texas starts about the middle to late March and that traps needed to be placed during that time. By the time I found out this information, it was already close to March and I needed to build my traps and decide where to place them and pretty quickly. I already had one that I built a year earlier and I decided that I would build 3 more for a total of 4 traps. I had been on a frugality kick lately, so I thought I would try to build them out of scrap wood or anything I might find cheap or free. I ended up deciding on used wooden fence planks I got from a friend who was repairing some of his fence. For a beginner, 4 traps is pretty good I guess, but I have heard of people having 20 traps that they place all over. I had become resolved to the fact that since
this was my first official year and without having very many traps to improve my chances, I would be okay not catching a swarm. This was going to be a year of learning.


Once the traps were built and ready to deploy, I needed to find a place to put them. I really didn't want to put them too far from home, but I needed to place them in different locations. A neighbor of ours, down the
Swarm trap in back yard
hill toward the highway had a yard sale one weekend. I went to the sale and started talking with the gentleman about different things and I found out that he owned acreage across the  highway. It's a large field that's primarily used for hay. Along the back side of the field is a tree line and creek that runs the entire width of the field. Thinking about the book I read, I knew that a good location for a trap is at the edge of a forest or tree line next to a field. I also thought that the creek would also be a good place. I didn't read that in the book, however. I asked the man if he would allow me to place a few traps at the edge of the field. He said that was fine as long as I would give him some honey. I chuckled and said I would be glad to, but I really didn't have much hope. I really was not wanting to set myself up for disappointment.

Trap by creek's edge
Well the days passed and life happened. I really don't remember the exact day that I put the traps out, but I know that it was way passed the middle of March. And I think it was closer to the end of April, maybe even May. That's why I should keep this blog updated. I would be about to know for future reference. Anyway, it was late and I knew my chances were not very good. I placed one trap on a nice sturdy tree about 6 feet from the ground. It was about 10 feet or so from the fields edge and out of view. It was also about 20 feet from the creek. I hung it, baited it and left. I placed another trap probably about 300 yards away along the same meandering tree line and not far from the creek. I also placed this trap about 6 feet off the ground. I then placed a third trap on a tree in my backyard.  I know that's only 3 of the 4 traps. I just never got around to hanging the other trap. So then I waited. I checked the traps about once a week and nothing had changed. In fact, one of the traps close to the creek had become a home for a bunch of roaches and rollie pollies. We had had some rain, and the fence boards that made up the trap had soaked in a lot of moisture and the bugs loved it. I had to kick out the unwanted bugs several times. I thought that if I was a bee, I wouldn't want to live there.

Then, during the week leading up to Memorial Day, I walked down to check the traps by the creek. I came to the first trap and to my surprise, I saw bees coming and going from the trap. I couldn't believe it! It's hard
Bees in trap
to explain the kind of feeling I had when I saw those bees. I immediately realized that if nothing else happened, then this year would be a success! I almost skipped to the next trap, not really caring that it would probably be empty. the next trap indeed was empty except for useless bugs that had yet again moved in. I dumped them out and re-hung the trap. I went home at a more happy pace and tried to figure out what to do next.


Sunday, February 10, 2013

Rendering Lard

Not too long ago, I began a quest for the perfect biscuit. I think some people say, that biscuits are the easiest bread to make and they are probably right. But I think that there is somewhat of an art to making biscuits. There is just something about that light flaky texture that sets it apart from other breads. And when it's done right, you just know it. My daughter says that my biscuits don't need anything on them so in my mind, I guess they are pretty good.

I always make my own biscuit mix and until now, I have used shortening for the fat content. After all, that's what gives biscuits that flaky texture. Then I found out that you can make your own lard, by rendering down pig fat. I have heard that lard makes the best baked goods including pie crusts and biscuits. Lard is available in a plastic tub off the shelf from my local grocery store, but everything I have read says that if you don't have to refrigerate it, it's no good. It is filled with preservatives and other oils. So I began looking for pig fat and quickly found out that it's not that easy to find. Just recently, I discovered a slaughter house about 30 minutes away and spoke with a really nice gentleman who made me a deal.

This is 1/3 of the total fat I received. He actually gave it to me in a frozen state, and I let it thaw in the fridge for a couple of days. I didn't weigh it, but it's probably close to two pounds.


 This is after cutting it up. It's best to cut it into small pieces because it will render more liquid. This is the hardest part, because you need a really sharp knife to cut it. Some people are able to get the butcher to run it through the grinder for them. That's probably a really good idea, but I didn't know to ask at the time and it was frozen so I didn't want to trouble anyone. One good thing about cutting it myself is that I was able to discard of any remnants of meat that may have been left. If you render the meat along with the fat, it may tend to add some flavor to the lard and it might not be good for pastries or bread. If you are just going to use it for frying or adding to savory dishes, a little meat is probably fine to leave in.


The fat cannot burn while it's rendering. That will also add flavor and I don't want that. The best way is to cook it slooooow. I decided to use this electric skillet. Since it has a thermostat, I don't have to worry about it getting too hot. I also added about 1 cup of water before adding the fat. This kept the fat from heating too quickly and potentially burning at the start. I really wasn't sure at what temperature to set, so I averaged around 225 degrees. I think this worked pretty well, because it did cook very slowly. Maybe too slow, I'm not sure.


This is the fat at the beginning in the water.


This is after about 90 minutes of cooking. One thing for sure is that you have to have some time to do this. It's very time consuming.

This was after about 3 hours. It looks a little like cooked onion. Now it's time to drain.


 I decided to use small jars, a canning funnel, a fine metal sieve and a couple of sheets of cheese cloth. I simply tipped the skillet and spooned the fat and liquid into the jars. Even though the fat was not completely  finished, I collected the liquid. Once the fat drained, I returned it to continue melting. I will then use that liquid for frying and flavoring. The longer the fat cooks the more flavor it adds to the rendered lard.

This is what I got from the first pour. It's a really beautiful golden color. I'm not sure how much this is, but I think it's about 3 cups so far.

This jar is from the second pour, about 90 minutes later. You can see it is a little darker in color than the previous two. This one will probably have a little pork taste to it. It's probably fine for baking, but I may use this in flavoring beans and maybe frying an egg or two.

This was the final product of the "cracklins" or fat that did not render. I really don't think that they were completely finished, but I was on a schedule and needed to quit. It just didn't seem like they wanted to give up anymore liquid. I decided that I may have been a little too careful not allowing them to burn. I probably could bump up the temp to 275 and be okay. Maybe on my next batch, I will try that.

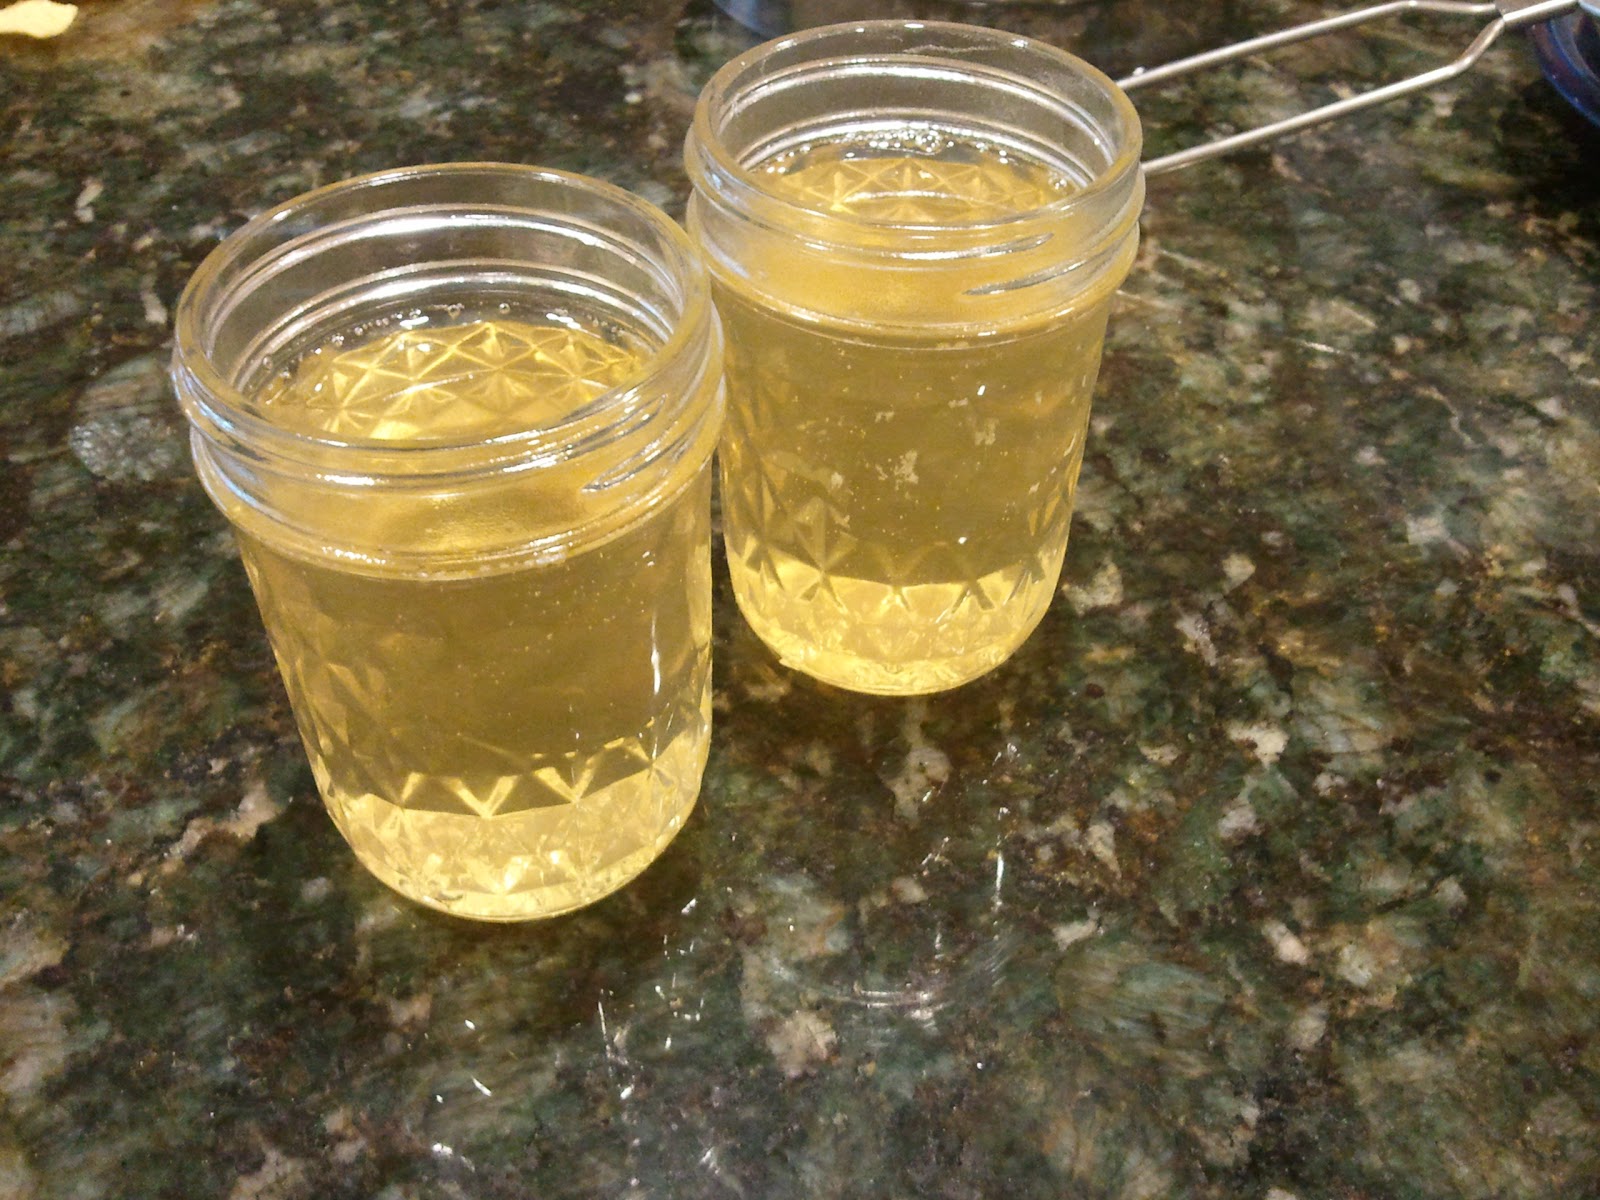
But, I would say the job was a success. These are the three jars completely cooled. The one on the right is just a little darker than the other two. This is probably about 4 cups of lard.

Final thoughts: This is a long process. I will do it again and you really don't have to babysit too much. Is it worth it? I think so. After spending so much time on it though, these are really more valuable in my mind than you average can of Crisco. If the saying "time is money" is true, then these are really expensive. I will try them in my next batch of biscuits and that will really tell me whether they were worth the effort.


Presto 06852 16-Inch Electric Skillet with Glass Cover


Friday, January 25, 2013

Update on estate sale find

Well, what do you know, another post. And it hasn't been a year since the last one. Maybe I'm on to something. One of the things that I hope to do is complete some jobs that I start and one of those was to redo the director chair that I obtained from an estate sale. It was in the last post. Here is the picture again.


At that same estate sale, my daughter saw a brand new seat and back replacement for a chair such as this. I can only assume that it was meant to be used for this actual chair. Anyway, I decided I would paint the chair and make it look nicer than it was, then use the replacement seat and back. Here is how it turned out.


The chair really came out nice, I think. The total price ended up being about $2. This style of chair sells on the internet for around $120 so I think we made out good. I don't plan on selling it yet, but if one of my readers really likes the PINK fabric, let me know. I will make you a deal. By the way, did I mention it was PINK!

Saturday, January 12, 2013

Amazing What You Might Find

Who am I kidding? Updating my blog is like going on vacation. It happens once a year and it's fun. Actually, every time I post, I say to myself, "self, I'm going to update more frequently this time!" There I said it again. Honestly, I have lots of things I can post. It's just that it takes me a while to figure out what to write and I'm somewhat of a perfectionist and if it doesn't look just right, I get frustrated and blah, blah, blah.

Anywho, here we are again with another long after due post and this time I thought about doing something kind of weird that I have never seen before. I enjoy going to garage and estate sales and from time to time, I think I actually get really good deals on things that I can't possibly live without. So I decided that I wanted to share my finds with the world. I know you really can't wait to see all the treasures, so here goes.

I found a good estate sale today. In fact, it was so good, I'm really thinking about going back tomorrow when they will have everything 25% off! This was close to Lake Texoma and it was the estate of a deceased couple that I have decided I would have really liked to know. They seemed to take an interest in everything that I like from gardening and cooking to bee keeping and just general outdoor puttering. They had lots of books on birds and other wildlife from Texas and many tools and cooking toys. They have several out buildings, a few were in bad shape with treasures untold inside.

Anyway, following is a couple of items I found.
 I found this pith helmet right before I walked out the door and almost missed it. It is a beekeepers hat and it works perfectly with my netting that I have. As you can see, it was $2.00. This helmet is in excellent shape and appears to have been worn seldom.

We have needed some additional coffee spoons for quite some time. Even though only two of these match, I wanted to get them. There is nothing special about them and I don't really shop for spoons very often. I got all four for $1. I'm not sure that's a good deal or not, but I'm happy.


This directors chair was not really on my list, but I found it in one of the out buildings. My daughter had already found a brand new replacement seat and back for it that she was going to purchase for a chair at church that needed it. So when I saw the chair, I had to get it. Don't have a specific price on this because it was bundled with several other items. I will let you know of the total cost of the items in a moment. The chair has some mildew in areas because of it's location close to the elements, but the wood seems to be in good shape. I think the plan is to clean and paint it.


This is an excellent shovel, perfect for turning compost or cleaning chicken droppings from the coop. Again, this was bundled, so can't be specific on the price.


This was a REAL find in my opinion. Four bee supers and queen excluder. The excluder is to keep the queen from going places within the hive where you don't want her to go. There is some rusty areas on the excluder and I don't know what effect that will have on the bees. The supers are in good shape but pretty dirty. I will scrape those down and paint and they will be good as new. Again, bundled.

Now, for the above 3 items, I was able to score all of them for just $6!! That's right, $6.

If for nothing else, if I can just keep this kind of posting up, I know that I, myself will enjoy looking back at the wondrous items that I find from time to time and remember the deals and the neat people that I get to meet. I hope you enjoyed this.

See you next year!!

Hopefully, just kidding.


Tuesday, May 08, 2012

New Flowers for the Garden

About a month ago, we were on an outing with several members of my side of the family. This outing took us out in the country to explore what was my Great Grandfather's homestead. It was a lot of fun looking around, trying to imagine my ancestors working in the garden or plowing a field. My sister, Jeanne was walking close by and spotted what looked to be a weed of some sort. She decided to dig it up and try to keep it alive and plant it in her garden. I don't think it was so much the plant itself, but more of a reminder of the day and that she can say that the plant came from the area of our forefathers. Anyway, it was a neat idea and she actually kept the plant alive and it seems to be thriving.

So this past weekend I went on a camp out with a men's group from  my church. We went to Beaver's Bend State Park in southeastern Oklahoma. We had a good time fishing, canoeing, and even a little hiking. Along one particular hike, I spotted some interesting and pretty wildflowers along the way. I was taken back to when Jeanne dug up that plant and successfully kept it alive and transplanted it. I decided that I would like to try to do the same thing. Why not? Beaver's Bend is one of my favorite places to camp and this would be a way to remember the weekend and the State Park itself.  The one that caught my eye was a tall, single stemmed plant with small, purple flowers. When I say tall, I mean about 4 feet tall and I had no idea what it was, but what interested me was that it was growing in what appeared to be full shade. And I have a lot of shade around the yard. So I thought that if I could just keep it alive on the trip home, it might grow in my yard. I had nothing to dig with except my bare hands, but I did have a foam cup that I could put it in. So with as much strength as I could, I dug around with my fingers and got as much soil and hopefully all the root system. It actually wasn't too hard. It was growing on the side of a hill and the dirt was pretty soft around the plant.

Amazingly enough, the plant made it back to the campground, then the 2 1/2 hour trip back home. Here is what it looks like.


And I finally found out what this plant is. This is a Streptanthus maculatus ssp. obtusifolius or more commonly known as a Twistflower. It is native to Arkansas but I guess has crept into eastern Oklahoma. Yes, I know, I don't live in Arkansas or Oklahoma, but don't tell the plant that. We will see what it does if it survives my flower bed.

Monday, April 23, 2012

Look What I Invented!

Okay, not invented. Taken from the internet is more correct. But, I did build it myself.
Some might ask "what is it?" Well, it's a compost screen. I have a pretty sizable compost pile, and have had it for quite some time. My only problem is that if I keep adding to it, it never really gets 100% composted. So I was looking around on the www the other day and I saw a guy demonstrate his compost screen. It looked great so I had to try it. I purchased a little hardware cloth, used some scrap 2x4's and built what you see above. It's 24" wide and about 24" high, almost square. It fits perfectly on the wheelbarrow.
 That is the compost as it is in the pile. You will see that there are some pretty big chunks. This is about two full shovels. I didn't put any more because I'm going to have to shake the thing over the wheelbarrow and when you factor in the weight of the wood, this is about the perfect amount.
This is what it looks like. There are still a few minor chunks, but overall, this stuff is perfect. And it's all mine, straight from my compost pile!
Black gold!

I have already used it with some plants and they look happy. That screen works perfectly and if I screen too much, I just throw it back on the pile. Now I can get compost whenever I need it.

Sunday, April 22, 2012

I can't believe that it's been a year since my last post. That's really inexcusable, is it not? So here it is April 21, 2012 and really lots of things have happened over the last year. Maybe I will be able to get to some of it and maybe I can keep this posting up. And I know I have probably said that every time I post after a long period of silence.

So let's pretend I've been posting all along and this is just another entry in a blog that I know you have been enjoying reading daily.


In all honesty, I do find it difficult to keep up with some regularity, but I enjoy it when I can. Today was a beautiful day and I got a lot of things done outside. It started off with a visit to the yearly plant sale at the Grayson County Master Gardener's sale in downtown Sherman. They had a great selection and the prices were really good.

This is the selection of what I got. Each one was $1 and I thought that was a good price. Most are very common for this area and are easy to grow. I have Canna Lillies, Four O'clocks, Aster's, Shasta Daisy's and a few others. I have a definite location for most of the plants and am looking forward to getting them situated in their new home.

One of the big jobs today was to clean and prepare a rather large bed on the northwest side of the house. This side gets about 4 to 5 hours of sun and in the summer, the heat can be brutal. Here is a picture of some of the construction of this bed. This construction took place about 18 months ago.

Several years ago, I created a small retaining wall at the corner of the house with block. I didn't really want to spend the money on more block, so I decided to continue the wall with railroad ties and try to make it look half decent.
Unfortunately, these are the only "in progress" pictures I could find, but you can see there was quite a big of work to be done. There is actually a pretty good slope and I had to back fill quite a bit. Just for reference, this was May of 2010.

Now fast forward to April of 2012, the raised bed has been long finished but I never put anything in it, and it became ugly and overgrown. So this year, this was one of my "to do" items. I didn't really know what I wanted to put here, then I found out that a teacher friend at school has kids who are selling plants as an FFA project. They had several different species to choose from, but what caught my eye was lantana. I have found out that these are easy to grow in our yard. And once established they are big and fill in a large bed nicely. So that's what I decided to plant.

 These two pictures are of the bed and the lantanas all in there home. There is more than I need in this bed, I think, but once I see just how much space they will ultimately take up, I will probably move some to another area of the yard.

 We have talked it over and will add some iris's in the back. They bloom early in the spring and will provide a nice bit of color before the lantanas really show off. Then, the iris's will be done for the summer. We will also put some low growing plants in the front.

Here is a nice close up of one of them.


Sunday, April 24, 2011

Definately Not Cheep....er, Cheap!

It seems like I am always trying to figure out ways to make my life a little more complex and somewhat stressful. This time, I thought a perfect way of achieving this was to start raising chickens. Oh, I always have known that to a certain extent, raising chickens has time and money involved, but I know that depending on the type of person you are, really determines the level of enjoyment that you can get out of almost anything. With our nation appearing to head into the toilet on so many levels, I have heard that people are starting to simplify their lives and try to prepare themselves for a time when they might have to start living more frugally and not have the option of relying as much on things we have grown accustomed to. So my thought was to start raising chickens for eggs and possibly meat. So far, the journey hasn't been too bad. Amy and Erin have really enjoyed the little peeps and this has been a wonderful learning experience for all of us. I, for one, have really learned a lot about general construction techniques because of course, the chickens need a place to stay. I have also learned that those chickens need to lay a lot of eggs in order to make back the money that we have already invested in the project. I never thought that we would really save money in the process, but I was hoping that it would cost less than it has. That's what this post is about. I hope you enjoy the pictures of the construction process of what has become way more than what was probably necessary.

Here are four of the five new members of the Walton clan. We actually purchased 6, but one expired for no apparent reason. At the time of this picture, they are about 2 weeks old.


 Here you can see the idea that I got for a portable chicken pen. It's built out of 1/2 inch pvc pipe and chicken wire. The cost was about $25, but really worth it, because it lets them get out of their little brooding box and into the sunshine. This is not predator proof but under supervision, it has allowed our other outdoor pets to get used to the chicks without having them for lunch. In the background, you can see the start of the chicken house.


This is the start. I was able to score quite a bit of used wood from several friends and family members and that has helped with the cost. The foundation is always one of the hardest parts because you have to make it level and square.


Since the coop sits off the ground a bit, the chickens needed a ramp to get in and out of their house. Erin built this pretty much all by herself. I think she did an excellent job.


Here, you can see the little opening that the chickens will use for access. You can also see Erin's ramp in place.


The coop with some siding in place. I had to learn about rafters and cutting the "birds' mouth" in order to get the pitch right for the roof.


Here, I have installed all of the siding and the tin roof. I decided that I wanted a door tall enough for me to enter without bending down. So I cut a 6 foot door. Remember that this is for 5 chickens. I think we have room for growth.


The trim is going up. I found a pretty good deal on some fiber cement siding and decided to use that. The only problem was that it was too wide and I had to rip it. Not really that much fun when you don't own a table saw. I also own a masonry blade for my circular saw, but it was slow and VERY dusty. Erin has begun painting and you can see a little of the trim around the door has been painted. We also now have a window.


Erin painted the little chicken ramp and I think it looks very nice in place.


I found an old window at a yard sale for $1.50. Good deal, but difficult to insert and we won't be able to raise it. It's primarily for light anyway. I also built a custom door from scratch. Getting close to calling this place done. One thing I haven't added is the nesting boxes. They will go on the left side of the coop and will stick out so that we may collect the eggs from the outside instead of going inside and potentially getting our feet poopy.


That's all I have for now. I will post more when available.

Monday, March 07, 2011

My Next Chapter of Beekeeping

I knew I didn't want to give up beekeeping. After only one season and a pretty substantial monetary investment, for my pocketbook anyway, I couldn't just toss in the towel. Besides, I have learned so much and have really enjoyed watching the bees work. It's really amazing how they accomplish so many things and work so well together. So I decided to order another colony. Last year, I ordered my first colony from Dadant beekeeping supplies. There is a handful of locations all across the country and I am very lucky to have one just about an hour away in Paris, Texas. Usually, you have two choices when obtaining colonies: package bees and a nuc or nucleus colony. Package bees literally come in the U.S. Mail and you basically dump the bees into your hive with the queen in a cage. After a while the bees release the queen from the cage by eating a little candy plug and she goes right to work laying eggs. A nucleus on the other hand, is a small established colony in a small wooden box about half the size of a regular hive. That is what I ordered last year. I went and picked them up in Paris. The process of transferring the bees from a nuc is simply placing frames full of bees and brood from the nuc into your hive and you have an instant bee colony. Dadant does not sell package bees, so if I order from them, I have to get a nuc which is okay. The only problem is that you have to order them early. They have a limited number of nucs available and you have to put your name on a list. By the time I realized my bees had died, it was too late to order from Dadant, so I was out of luck. My only other choice, I thought, was to purchase a package from a reputable apiary and have them sent to me. Most apiary's don't send out package bees until sometime in May.
Then, as I was looking around on the internet, I came upon some information about building swarm traps. A swarm trap is a receptacle that you hang somewhere outside with a bait of some sort inside that lures a swarm to it. In theory, it's a relatively easy and dirt cheap way to get your own bees. At some point during the spring, a bee colony will naturally outgrow their home. When that happens, the bees will raise another queen. Then about half of the hive and queen will take flight to find a new home. That's not really something you want to happen if you already have a hive of bees because if they swarm, that means a lot less work is going to get done for a while. So you really have to expand their home for them so they don't get the urge. But in the natural world, the bees do it all the time. So a swarm leaves the hive in a big cloud and they will first find a temporary place to congregate. At this time, a bunch of bees will take off to find a more suitable permanent home. This is where the swarm trap comes in. If you have a trap and a bee happens to find it, then you just might get a whole new colony to set up shop right there in your trap. If that happens, you just transfer them into one of your empty hives and you have your own, free, bees. Yay! Well, seeing as how I like to do things on the cheap, I just had to give this a shot. After all, on warm days recently, I have seen lots of bees out among the dandelions, so I feel pretty
certain there is a colony somewhere close by. So after some research, I built my own swarm trap. It has been hanging in it's location now for about three days. It's still a little early for a swarm, but I am patient. I really hope I catch one. I am going to build a total of four traps and put them in various locations to better my chances. I will let you know how it goes. 

Sunday, March 06, 2011

Tomatoes From Seed

Well I thought I would try something new this year. I have always purchased little tomato plants and then set them out in the garden. This year, I thought I would purchase the seeds and start them myself. I have heard that it can be a little tricky growing tomatoes from seeds. I used a rotisserie chicken container as my temporary bed, put in some seed starter and planted the seeds. I then put the container in our laundry room until I just saw them poking through the starter mix. I didn't worry about the light. In fact, it was dark most of the time in there. It took about 1 week for the seeds to break the surface. Once they sprouted, I moved them to a southern facing window in our bedroom. I had read that new sprouts needed extra light time in order to become stronger. I decided to place a little clip on desk lamp next to the plants and keep it on every day for about 14 hours. I don't know if this actually helped, but the seedlings really grew well. It's been about 12 days now and it won't be long until I transplant the little plants into their own containers.
At this point, each one is about 1.5 inches high and has two little green leaves. Hopefully, they will survive the stress. After that, I have to harden them off by placing them outside for a short time everyday. We will see how it goes.

Friday, March 04, 2011

Hive Died. What Next?

So, my only bee hive died during the winter. When I discovered them, it bummed me out and I really didn't want to do anything with the hive right away, so I placed the whole thing in the shed and I just left it there for a couple of weeks. A few days ago, it was a warm day and I was out getting some things done around the yard. I decided to take the hive out and really inspect it. I set it on the ground and took out some of the frames. I looked at the couple of frames that had capped honey in them that for whatever reason, my bees didn't eat. There wasn't much and since I had no bees, I would try to harvest the little bit that was there, especially since I hadn't gotten a chance to taste any honey that the bees stored.  I took the frames inside and cut the part of the comb out that had the honey. I had read a little about a harvesting process called crush and strain. Normally, you would cut the caps off of the comb, hang the frame in a honey extractor and spin the honey out of the comb. Crush and strain, on the other hand, is a process by which you cut the comb out of a frame and place it in a shallow pan. You then crush the comb with blunt object or your hand, then let the honey strain through a very fine filter into a vessel for storage. An extractor is pretty pricey and the crush and strain method seemed like a good alternative. Since there wasn't that much, I really didn't have to crush it. As I cut it off, it basically fell apart. I put the comb and honey in a pan lined with waxed paper. I then needed something to strain the honey with. I had read about people using paint strainers or stockings. I didn't have a paint strainer, so Catherine was nice enough to let me have one of her clean stockings.
That ended up working perfectly. I stretched the stocking over a small jar, then spooned the honey and wax into the stocking. Before long, we had a little jar of yummy honey from our own bees. It was quite an accomplishment. And the honey was indeed yummy!